NOTE: This website is frequently updated. Last update May 2022
This is a collection of some general information about David's Strat setups, and some setup tips. Some of this information is repeated elsewhere on this site, but I thought it would be helpful to consolidate it in one place. The setup for the Black Strat is from the rare 4th, and final, edition of The Black Strat book by David Gilmour's long time gear tech, Phil Taylor. A big thanks to Phil for giving us that great book. Anyone interested in Gilmour's guitars and musical gear should own a copy.

TOOLS - You will need a few basic tools to set up a Strat. A phillips head screwdriver, an alan wrench to adjust the saddle screw heights, and a capo. You will also need a small ruler, caliper, or string height gauge to measure the string and pickup heights. A guitar tuner is also handy for speedy retuning when doing the tremolo setup.


STRINGS and STRING GAUGES FOR STRATS, TELE, AND LES PAUL - David Gilmour has used various guitar string gauges on his Strats and various strings brands like Gibson, Rickenbacker, Ernie Ball, and GHS. For electrics he usually uses light gauge strings in the studio. When performing live he plays heavy handed and is harder on the strings so he uses a heavier gauge.
In the early 1970s David was using Gibson Sonomatic light gauge electric guitar strings and later Ernie Ball light gauge. In the late 1970s he was using a custom gauge set of Gibson Sonomatic on his Strats in the studio, and a set of different gauges when playing live.
late 1970s Strat gauges used in the studio - 0.10, 0.12, 0.16, 0.25, 0.34, 0.44.
late 1970s Strat gauges used on stage - 0.10, 0.12, 0.16, 0.28, 0.38, 0.50.
The Black Strat book contradicts this info, but I am going with what David actually said he used in a 1979 interview.
When recording The Wall in 1979 David changed to GHS Boomer strings and has continued to use them on his electrics. At the time I wrote this article David was still using GHS Boomers in non standard gauge sets for his Strats. GHS sold this exact set (as of 2008) as GB-DGF David Gilmour Signature Blue Set Electric Guitar Strings. The Fitch/Mahon Comfortably Numb History of The Wall book a lists David's Telecaster string gauges.
Strat string gauges from 1979 to now - 0.10, 0.12, 0.16, 0.28, 0.38, 0.48
Telecaster string gauges from 1979 - 0.10, 0.12, 0.16, 0.24, 0.36, 0.44
David used a heavier gauge set on his Les Pauls. GHS sold this exact set (as of 2008) as GHS GB-DGG David Gilmour Signature Red Set Electric Guitar Strings.
Les Paul string gauges - 0.105, 0.13, 0.17, 0.30, 0.40, and 0.50
Years ago I used to use regular light Gibson Sonomatics. I really liked them but they were a bit too heavy….well, I didn't use the top end…Let's see, and then I went to Ernie Balls because I could get them a bit lighter. And recently, I don't know quite when, Gibson started bringing out those Sonomatics in custom gauges, and I'm using those at the moment mostly...On my regular electric guitar at the moment (late 1978) I'm using the Gibsons (Sonomatics) again, which are 44, 34, 25, 16, 12, 10 gauges. It's pretty light for me. On stage actually with the Floyd I use heavier gauges, again on the bottom three I still use 10, 12, and 16 on the lighter strings, but I use 28, 38, 50 on the heavy bottom strings. That's for when I'm working on stage. I'm a bit heavy handed you know. - David Gilmour from a Steve Rosen interview for Guitar World conducted in late 1978 or early 1979
I use GHS strings, 10's - David Gilmour from Guitarist magazine June 1986
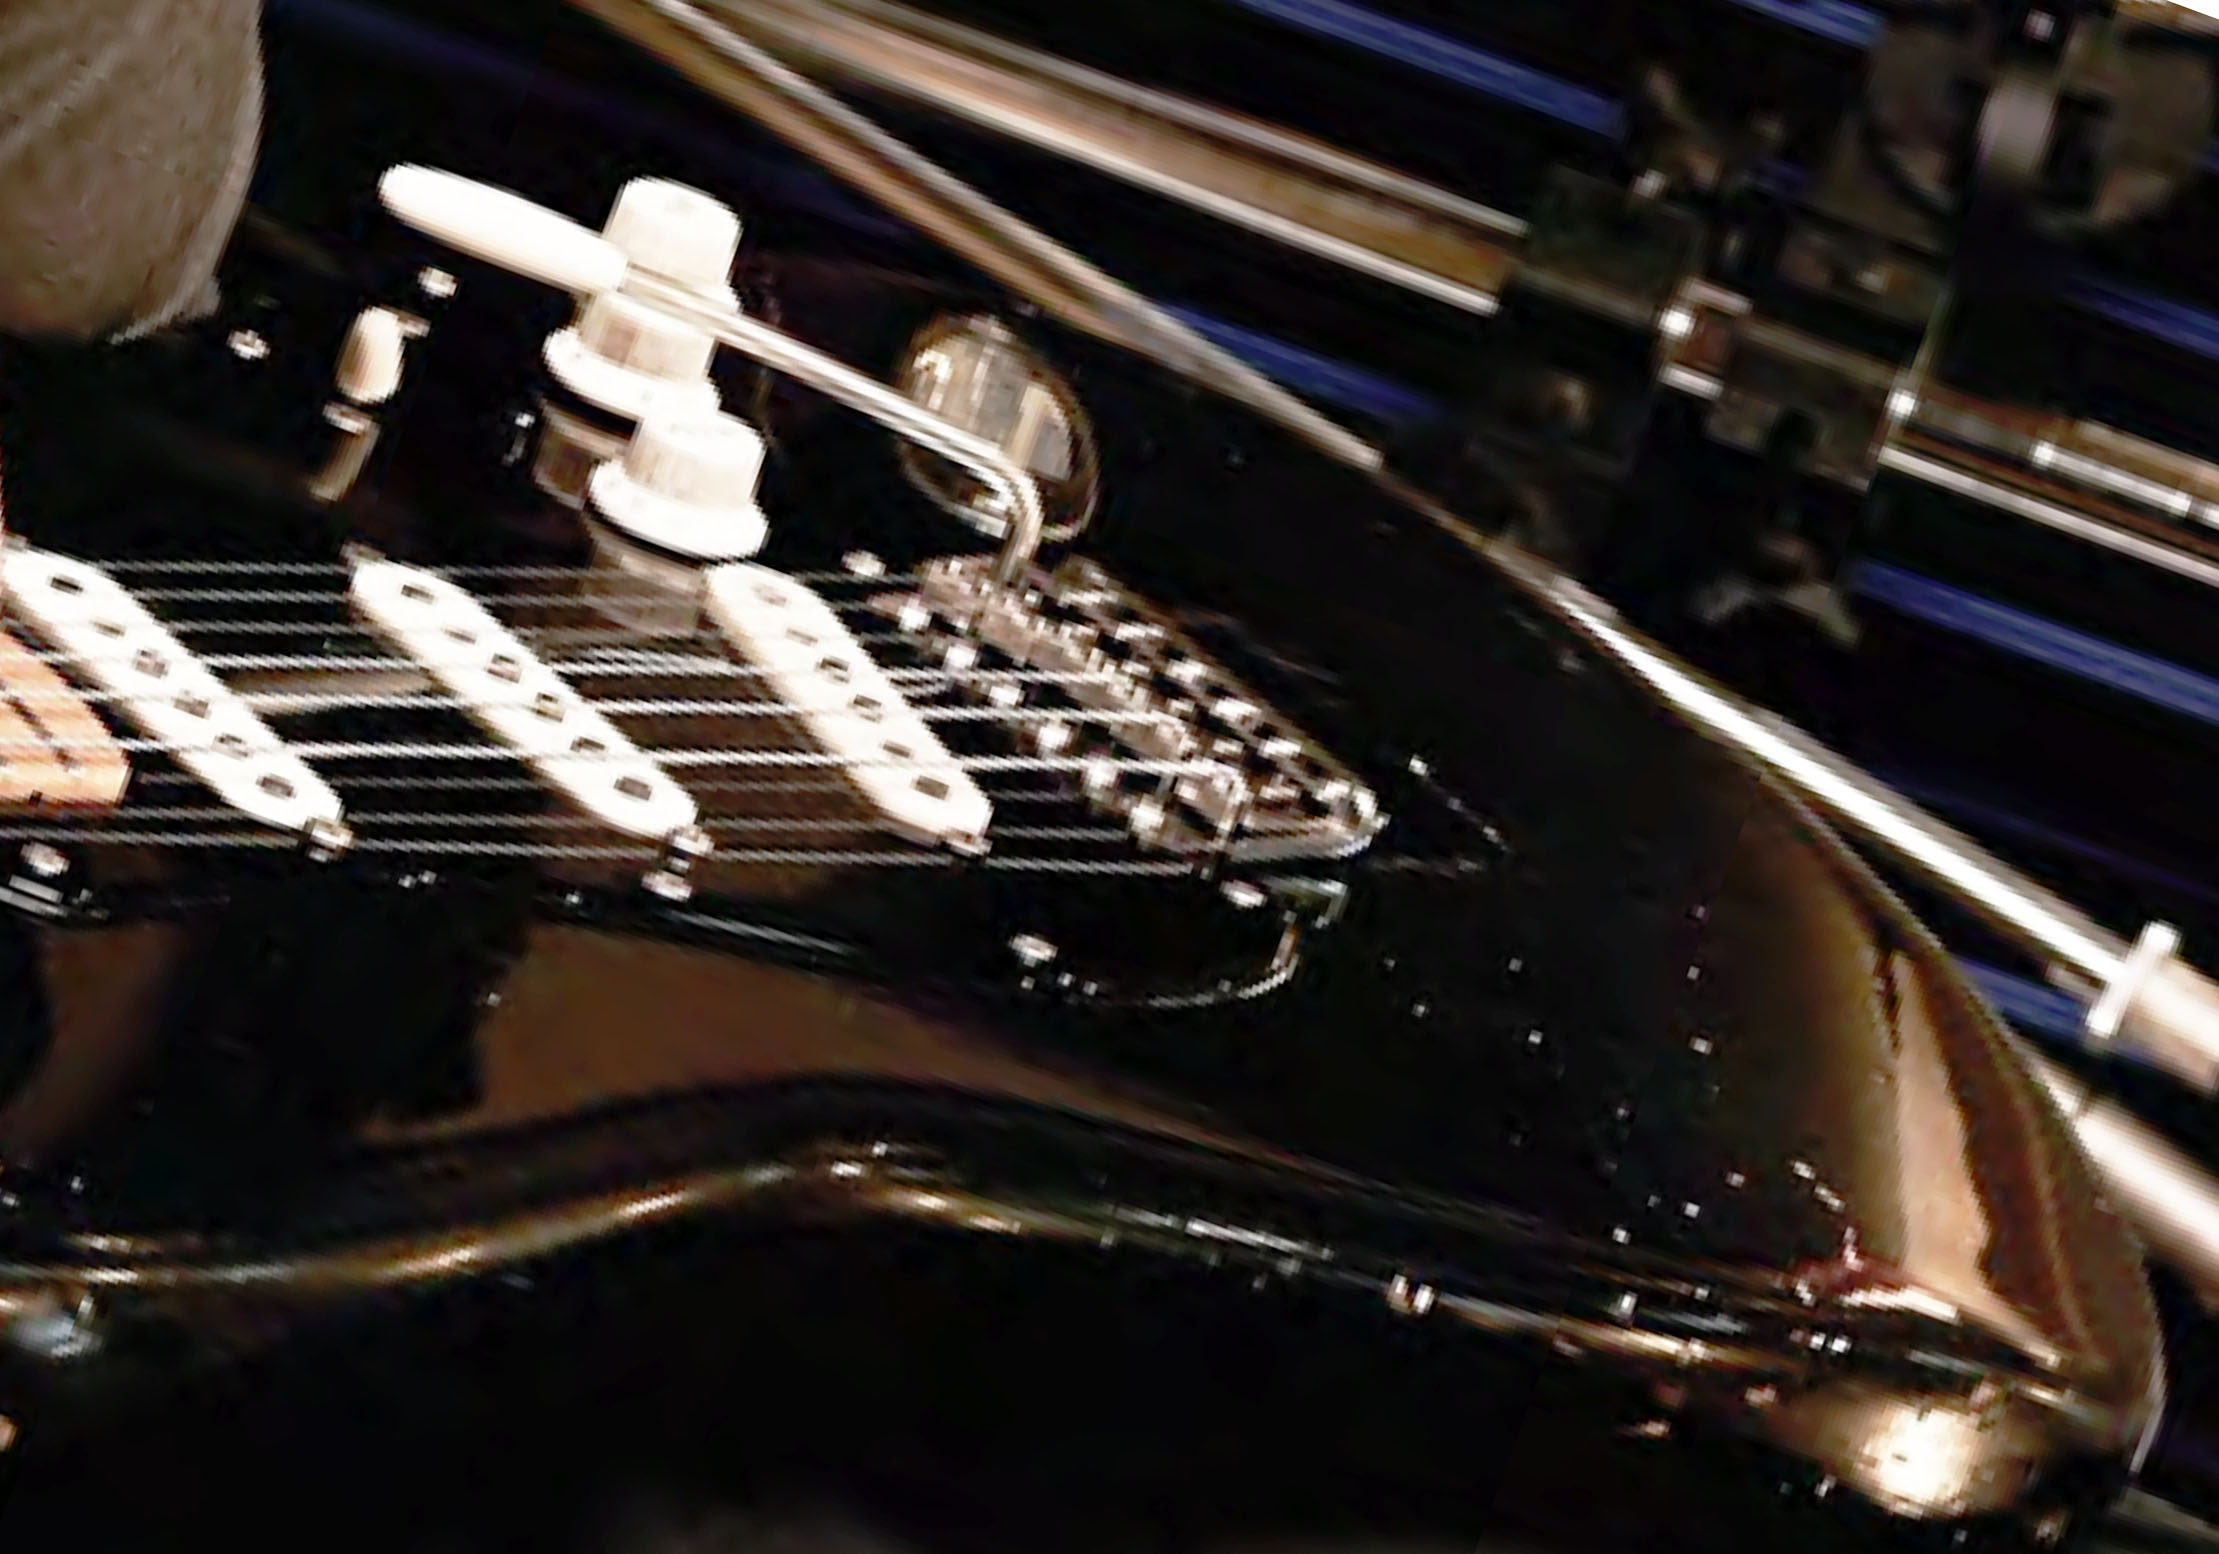
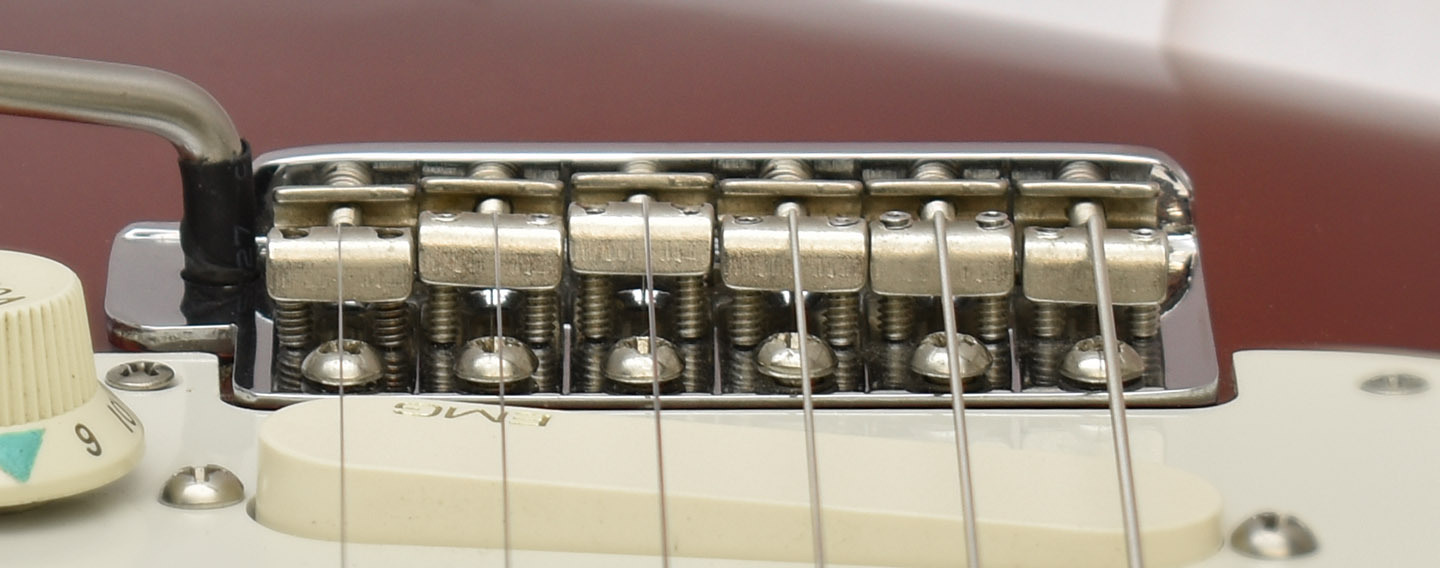
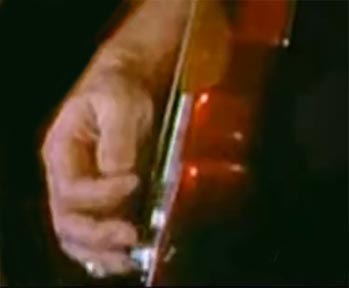
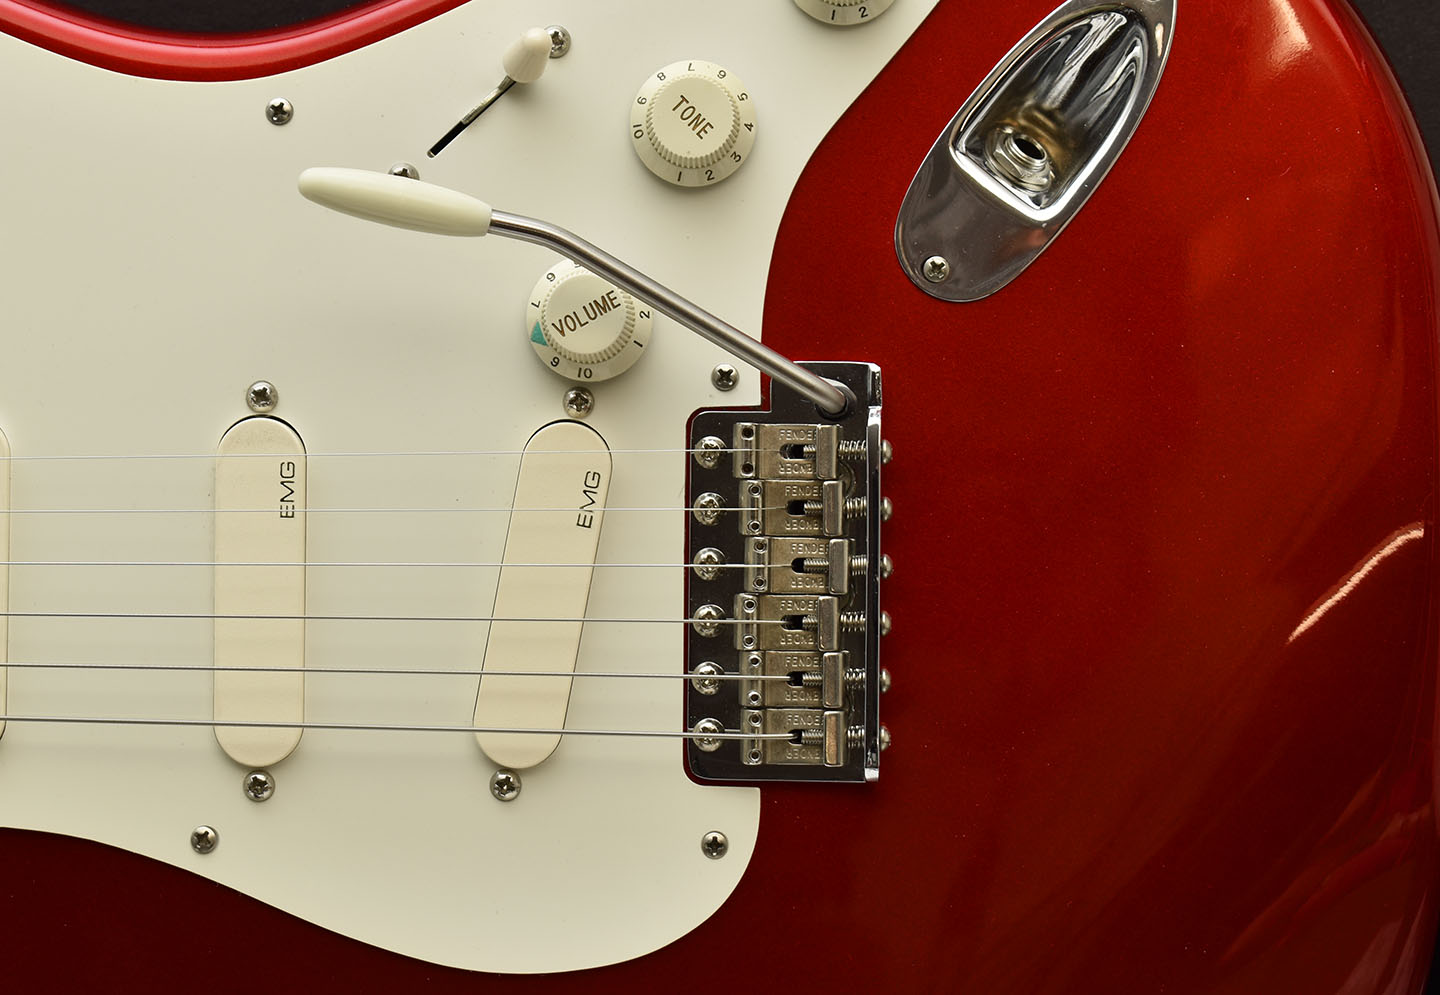
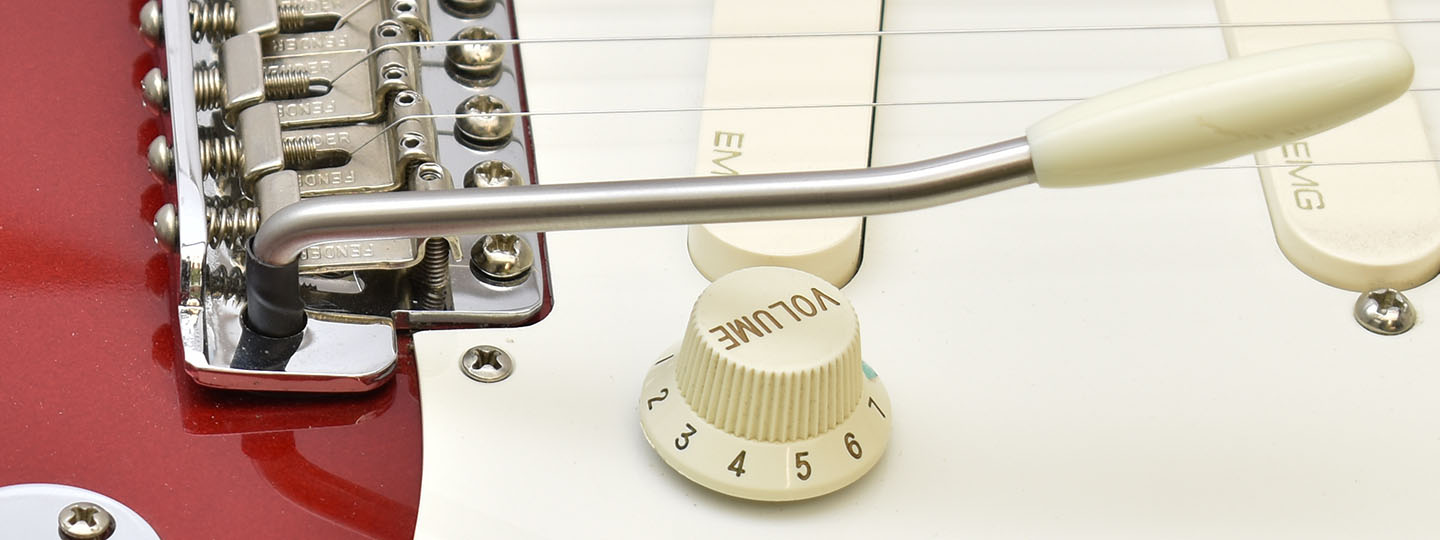
GILMOUR'S FLOATING BRIDGE SETUP - There is a lot of misinformation about whether or not David Gilmour used a floating bridge or a fixed bridge on his Strats. You can hear and see David pitch notes up when pulling up on the whammy bar when playing live, which cannot be done with a non-floating bridge. The photos below of the Black Strat and red EMG Strat should make it clear he used floating bridges, but Phil Taylor also gave the specs for David's floating bridge in The Black Strat book. As with most things involving his guitars, I suspect Gilmour went back and forth between floating and fixed bridges at different times in his career. The earliest use of a floating bridge can be seen in the 1971 film Pink Floyd Live at Pompeii. The bridge is lightly floating, so he could both pitch up and down. The tremolo screw side of the bridge plate contacts the body and the intonation screw side floats. It only floats a small amount, but it is high enough to allow at least a semitone/half step pitch up when pulling up on the tremolo bar before the back of the bridge touches the body.
The floating Black Strat bridge from 1971, Live at Pompeii
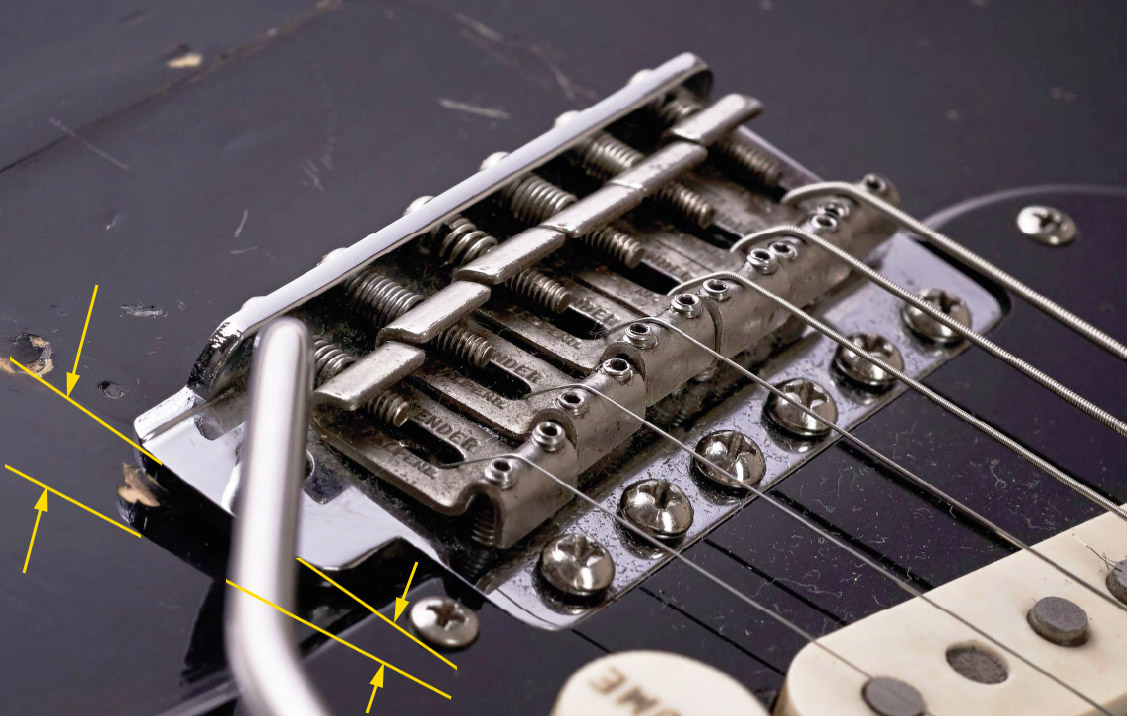
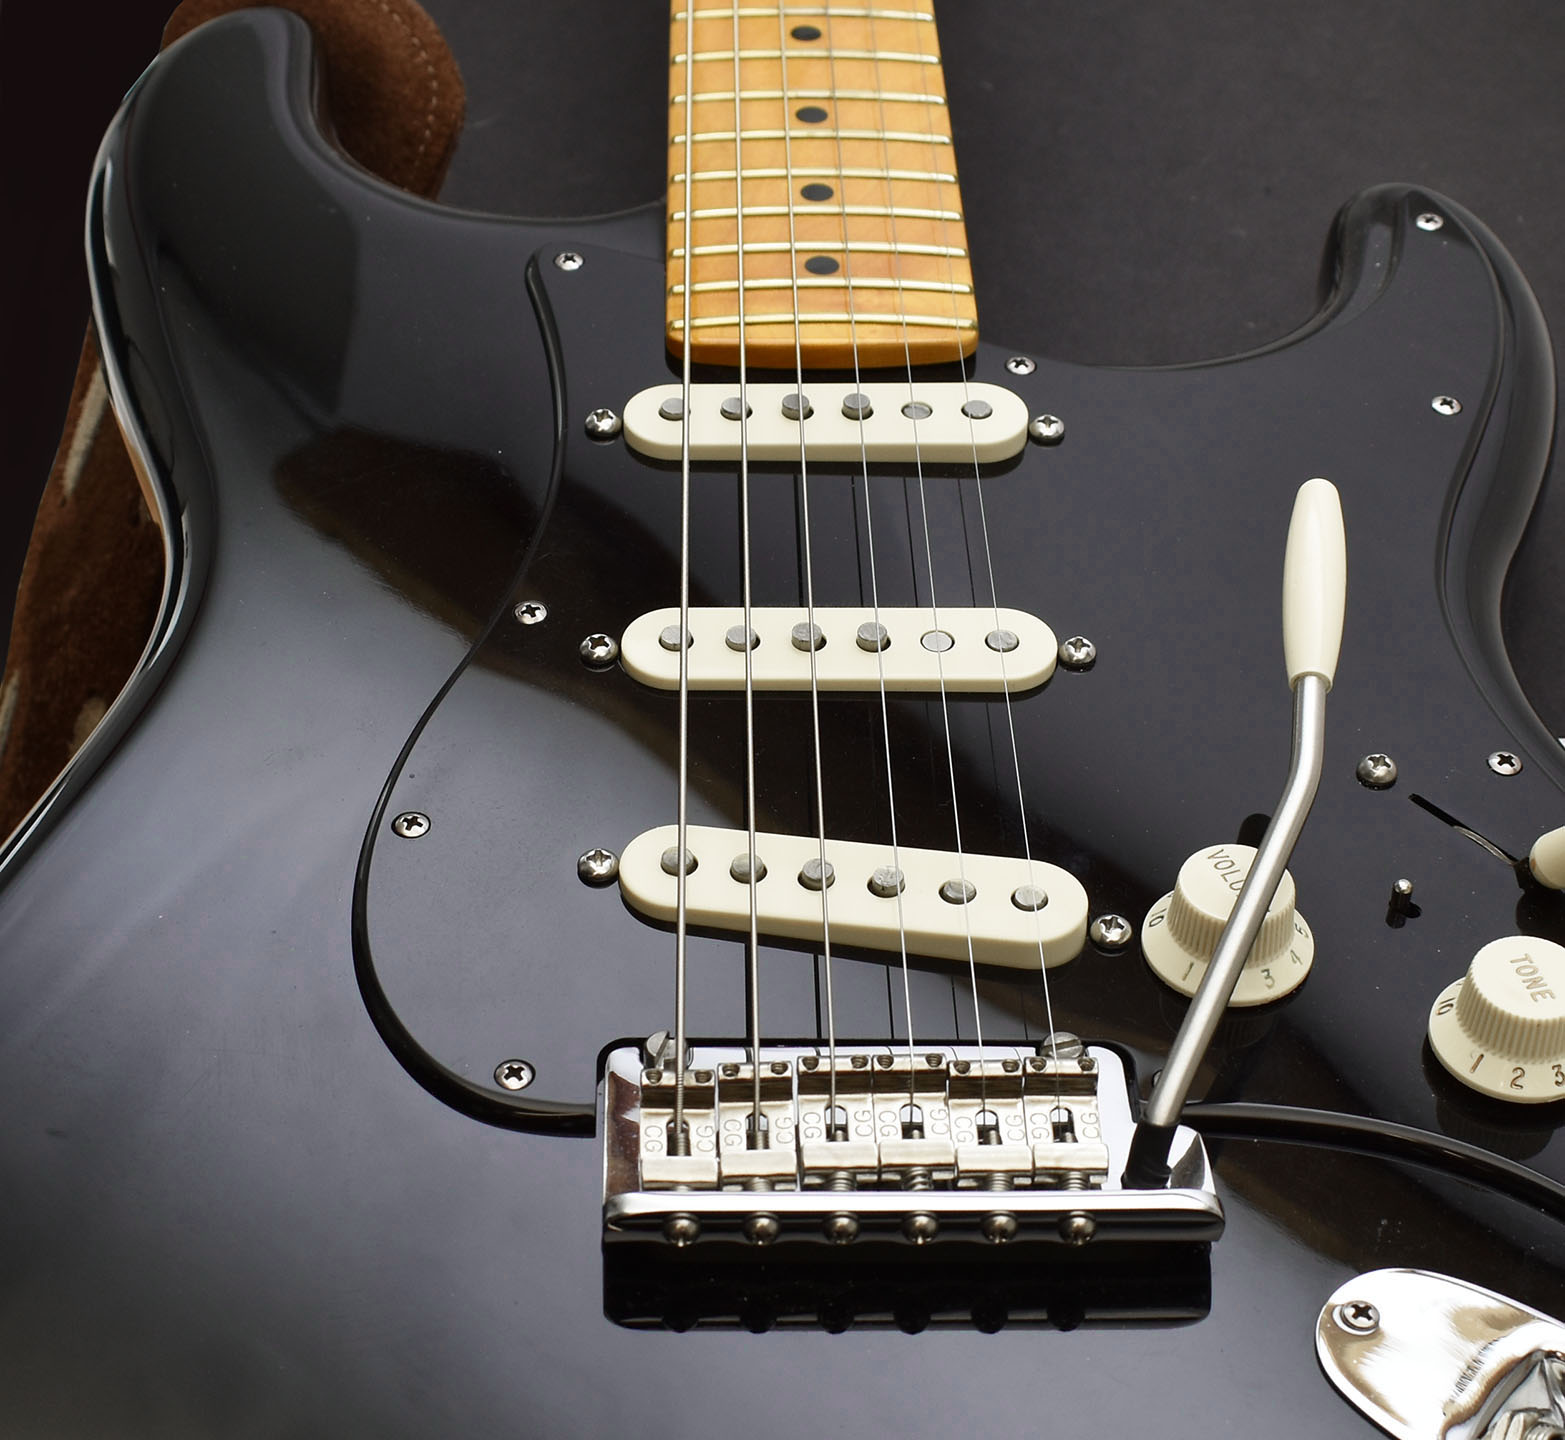
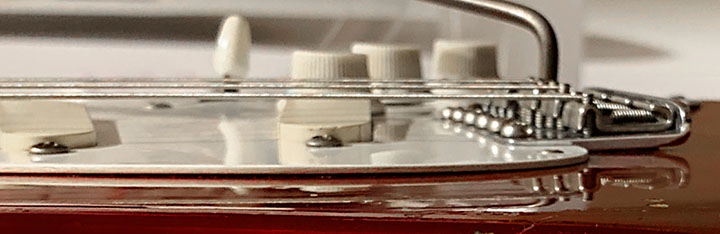
David's Black Strat bridge from 2014, floating 1.5mm off the body
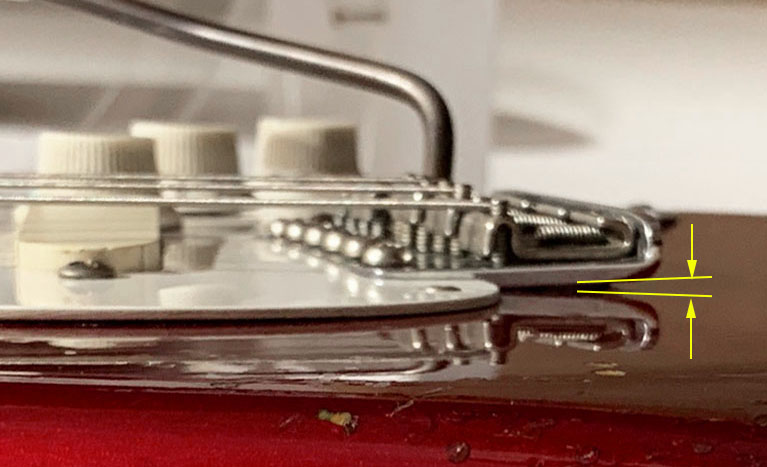
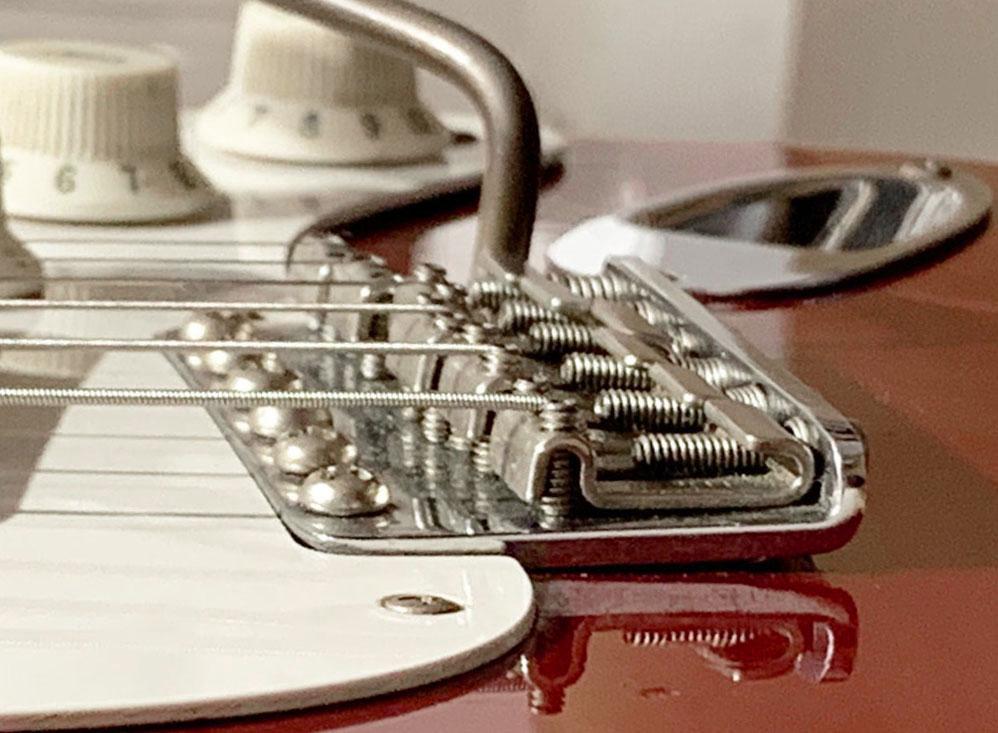
The bridge plates on Gilmour's Strats are resting on the body on the tremolo screw side, and floating about 1.5mm off the body on the intonation screw side
This is the bridge tremolo spec from The Black Strat book by Phil Taylor, David's gear tech: Set 1.5mm off the body measured at the front of the angled part that holds the intonation screws. This allows for almost a tone pull up on the G string.
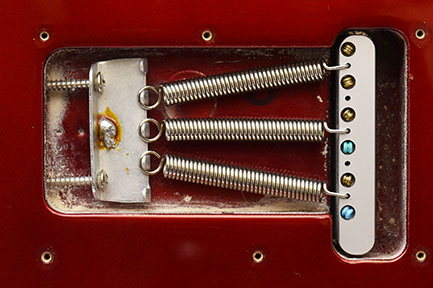
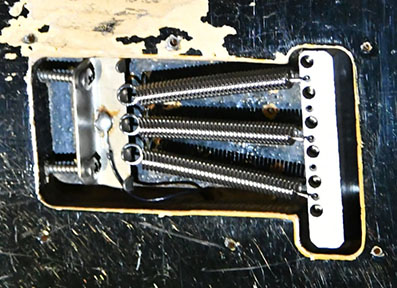
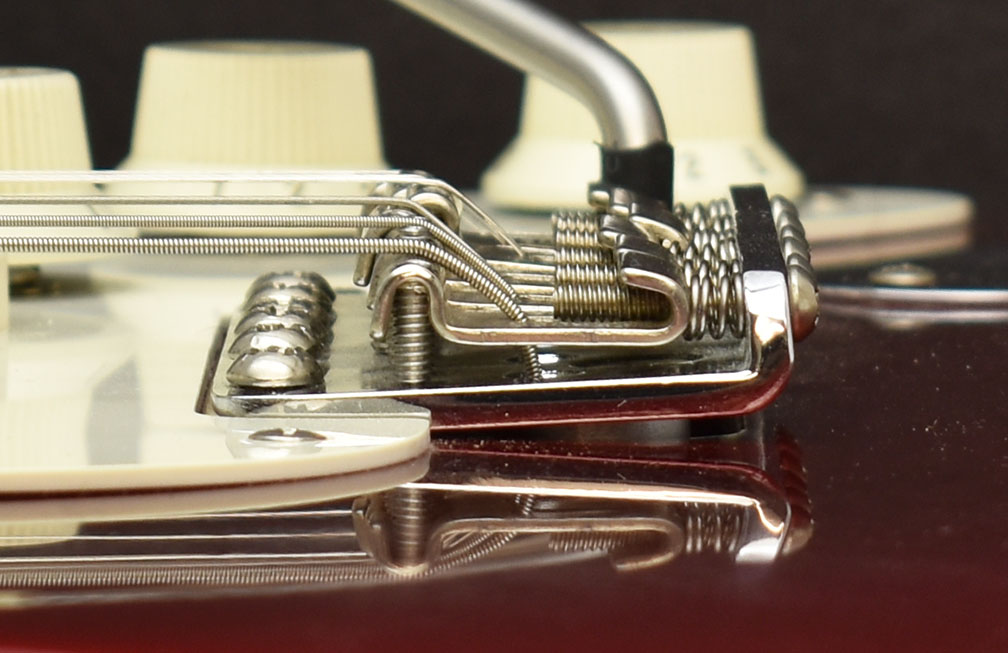
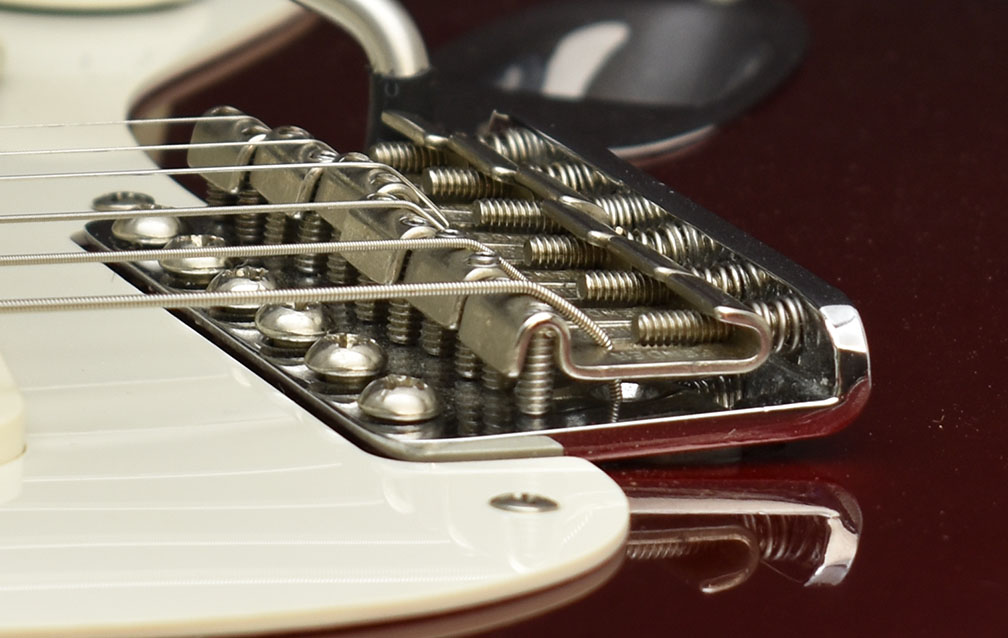
David tightens the two outer screws down so the bridge lightly contacts the body, but not too much. The four inner screws are raised slightly higher so they do not press down on the bridge plate at all. The back of the bridge floats slightly off the body, about 1.5mm. This allowed David to create a much deeper and wider tremolo effect that he became a master at using. He typically used three springs in his Strats in the studio. When performing live he plays more heavy handed and is harder on the strings, so he uses heavier gauge strings and four springs. Below is how David described setting up his tremolo in 2009, and this is how I set up mine.
These days, I typically use three springs. I like to let the bridge plate sit onto the body completely, and then I tighten up the six bridge screws until they sit perfectly on the top of that, without actually pressing down on it. Then, I tighten the strings up to get the right tension on them, and then I sometimes screw the screws that hold the springs at the back (the spring claw screws) deeper into the body until it gets exactly right. You can have those screws slightly looser and add a fourth spring, or you can remove another spring and tighten them up a little bit. - Guitar Player interview 2009
Photos from around 2006-2014 show the floating bridges on both David's red EMG Strat and his Black Strat were set up the same way. Gilmour stated in the January 2009 issue of Guitar Player that his current Strat bridge has three springs. If you watch him playing in the 2006 Remember That Night DVD, he does not seem to use the trem as much as he did in the '80s and '90s, but when he does it appears to be fairly tight, so he was probably still using four springs when playing live, as he had been doing since the late 1970s.
HOW TO SET UP A FLOATING BRIDGE - Most people set up a floating bridge to allow pitching up a semitone/half step (from F to F#, for example) when pulling up on the tremolo bar before the back of the bridge touches the body. That is similar to how Gilmour has his set up. You can set yours to pitch slightly higher or lower, but for Gilmour style tremolo, I recommend at least a semitone. I float my bridges much higher so I can pitch up at least a full tone/whole step.
First, remove the phillips head screws holding the back plate to the guitar to expose the tremolo springs. Determine how many springs you want to use in the spring cavity. Strats have 3-5 springs. The more springs you use, the more tension there is on the tremolo bar. I use three springs on my Strats because I use light guage strings and like the strings and the bar to feel looser, and that is what I recommend. Four springs makes the strings feel a bit tighter when bending and using the bar, but either 3 or 4 works. You can run the springs parallel, straight from the bridge block to the spring claw tabs, or angle the two outer springs inward to the claw, as I have done below. This adds slightly more tension than running them straight.
Most people will want to have the back of the bridge plate no more than 1.0 to 1.5mm off the guitar body for a floating bridge, but you can go as high as 3.0mm (1/8“). If, after retuning, the bridge floats too high, loosen the strings again and tighten the claw screws more. Then retune and check again. If it floats too low to the body, loosen the claw screws, retune, and check again. It is a balancing act between the string tension and the spring tension, so it requires some back and forth to get the right balance that feels OK to you.
Once you have the bridge floating properly, check the saddle heights. You want them to sit roughly parallel with the strings. Clamp a capo on the fret next to the guitar nut and use the strings as a straight edge guide for the saddles. Use an alan wrench to adjust both screws on each saddle until they appear level with the strings. Use micro adjustments or 1/4 turn each. The saddles should also roughly follow the neck radius, with the outer sadles lower, curving higher to the middle saddles.

Remove the capo, retune the guitar, and check for fret buzz. Check by playing each string individually, high and low on the neck. If any of the strings buzz against the frets, raise the saddle slightly until the buzzing stops. After the saddle setup and retuning, check the 12th fret intonation, as that may have changed.
IS A FLOATING BRIDGE DIFFICULT TO KEEP IN TUNE? - No. I have seen many claims that floating bridges do not stay in tune, and talked to a few people who tried them and had serious problems staying in tune. I am baffled by this as I have never encountered that problem on any Strat - US or Mexican made - and I rarely have to tune them. In fact, I find that my Strats with floating bridges tend to stay in tune better than my guitars with fixed bridges. The only string I find that sometimes goes out of tune when doing deep bends is the G string, but that is rare. The beauty of the floating bridge design is that you only have to pull up on the tremolo bar slightly and the G usually goes right back into tune.
I believe any tuning issues that occur after using the tremolo bar on a floating bridge are more associated with improper setup, and sometimes due to poor quality saddles and tuning machines. Below are some common problems that cause guitars to go out of tune.
• Not stretching the strings properly after restringing the guitar. Strings must be stretched until the tuning is stable.
• bad or incorrect string wrapping around the tuning pegs that allows the strings to slip
• nut binding caused by improperly cut string slots, non lubricated slots, or slots filled with debris
• temperature and humidity changes cause wood and metal to expand and shrink, especially if the guitar is kept
in a room that changes temperature more than a few degrees during the day, which can cause it to go out of tune
• poor quality saddles that bind or snag strings because of rough surface finishing
• poor quality tuning pegs that are not stable


STRING HEIGHT AND ACTION AT 12th FRET- Using ruler, caliper, or string height guage, measure the distance between bottom (underside) of the strings down to the top of the 12th fret. Adjust bridge saddles to the heights below. Gilmour's string height action is set 1.6mm on the treble side (high E) and tapers to 1.8mm on the bass side (low E). The G string is raised to 1.8mm. The spring tension action needs to be loose enough for a 1 1/2 step bend on the high E string at the 12 fret and a 2 step bend on the G and B strings at the 12th fret. Keep in mind that string height adjustments may also affect the guitar intonation, so always check and adjust.
Black Strat Neck Radius___String Height Bass Side_____String Height Treble Side
7.25"___________________5/64" (1.8 mm)_________________4/64" (1.6 mm)
Below are Fender standard string heights for various necks. Adjust bridge saddles to the height according to the chart below. If you are not sure what your neck raduis is, here is a handy neck radius guage you can print and cut out.
Neck Radius____________String Height Bass Side_________String Height Treble Side
7.25"___________________5/64" (2 mm)_________________4/64" (1.6 mm)
9.5" to 12"_______________4/64" (1.6 mm)________________4/64" (1.6 mm)
15" to 17"_______________4/64" (1.6 mm)________________3/64" (1.2 mm)
PICKUP HEIGHTS - Note, these specs are for passive single coil pickups, not active EMG pickups. In general, lower pickup heights will add more definition to your sound, but with a drop in signal output. Higher pickup heights will remove some of the dynamics, but you will have a higher signal output. Typically the the bass side of the pickups should be lower than the treble for an even string balance.
Below are David's pickup height specifications from The Black Strat book, although I'm sure they have varied throughout the years. Depress the strings at the last fret on the neck (highest fret next to the body). Using a capo helps. Using a caliper or ruler, measure the distance from the bottom of the 1st and 6th strings (the treble and bass strings) to top of the corresponding pole piece on the pickup.
Black Strat Pickups__________________________Bass Side / Treble Side
Bridge:_____________________________________ 2.75 mm / 1.25 mm
Middle:_____________________________________2.75 mm / 1.7 mm
Neck:______________________________________2.8 mm / 1.5 mm
Below are measurement guidelines for various other types of pickups. The distance will vary according to the amount of magnetic pull of the pickup. If you find there is too much fret buzz, raise the strings slightly higher. As a rule of thumb, the distance should be greatest at the 6th string - neck pickup position, and closest at the 1st string - bridge pickup position. Keep in mind that string height adjustments may also affect the guitar intonation, so always check and adjust.
Pickup Type________________________________Bass Side / Treble Side
Texas Specials: ______________________________8/64" (3.6 mm) / 6/64" (2.4 mm)
Vintage style, such as the SSL-5 or Fender CS69: ___6/64" (2.4 mm) / 5/64" (2 mm)
Noiseless™ Series: ___________________________8/64" (3.6 mm) / 6/64" (2.4 mm)
Standard Single-Coil: _________________________5/64" (2 mm) / 4/64" (1.6 mm)
Humbuckers:________________________________ 4/64"(1.6 mm) / 4/64" (1.6 mm)
Lace Sensors: _______________________________As close as desired (allowing for string vibration)
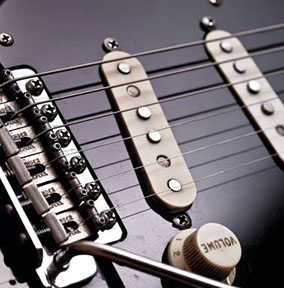
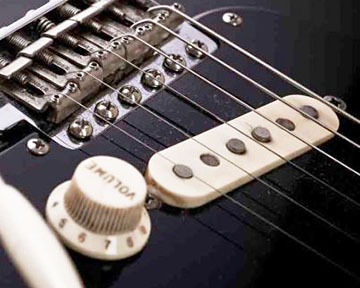
The Black Strat pickups
My Black Strat pickup heights
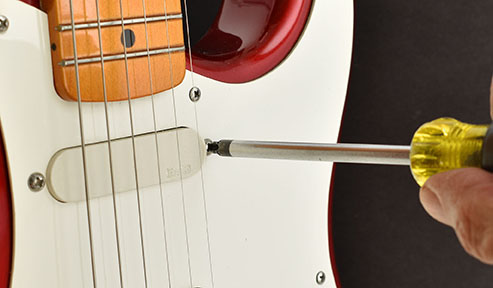
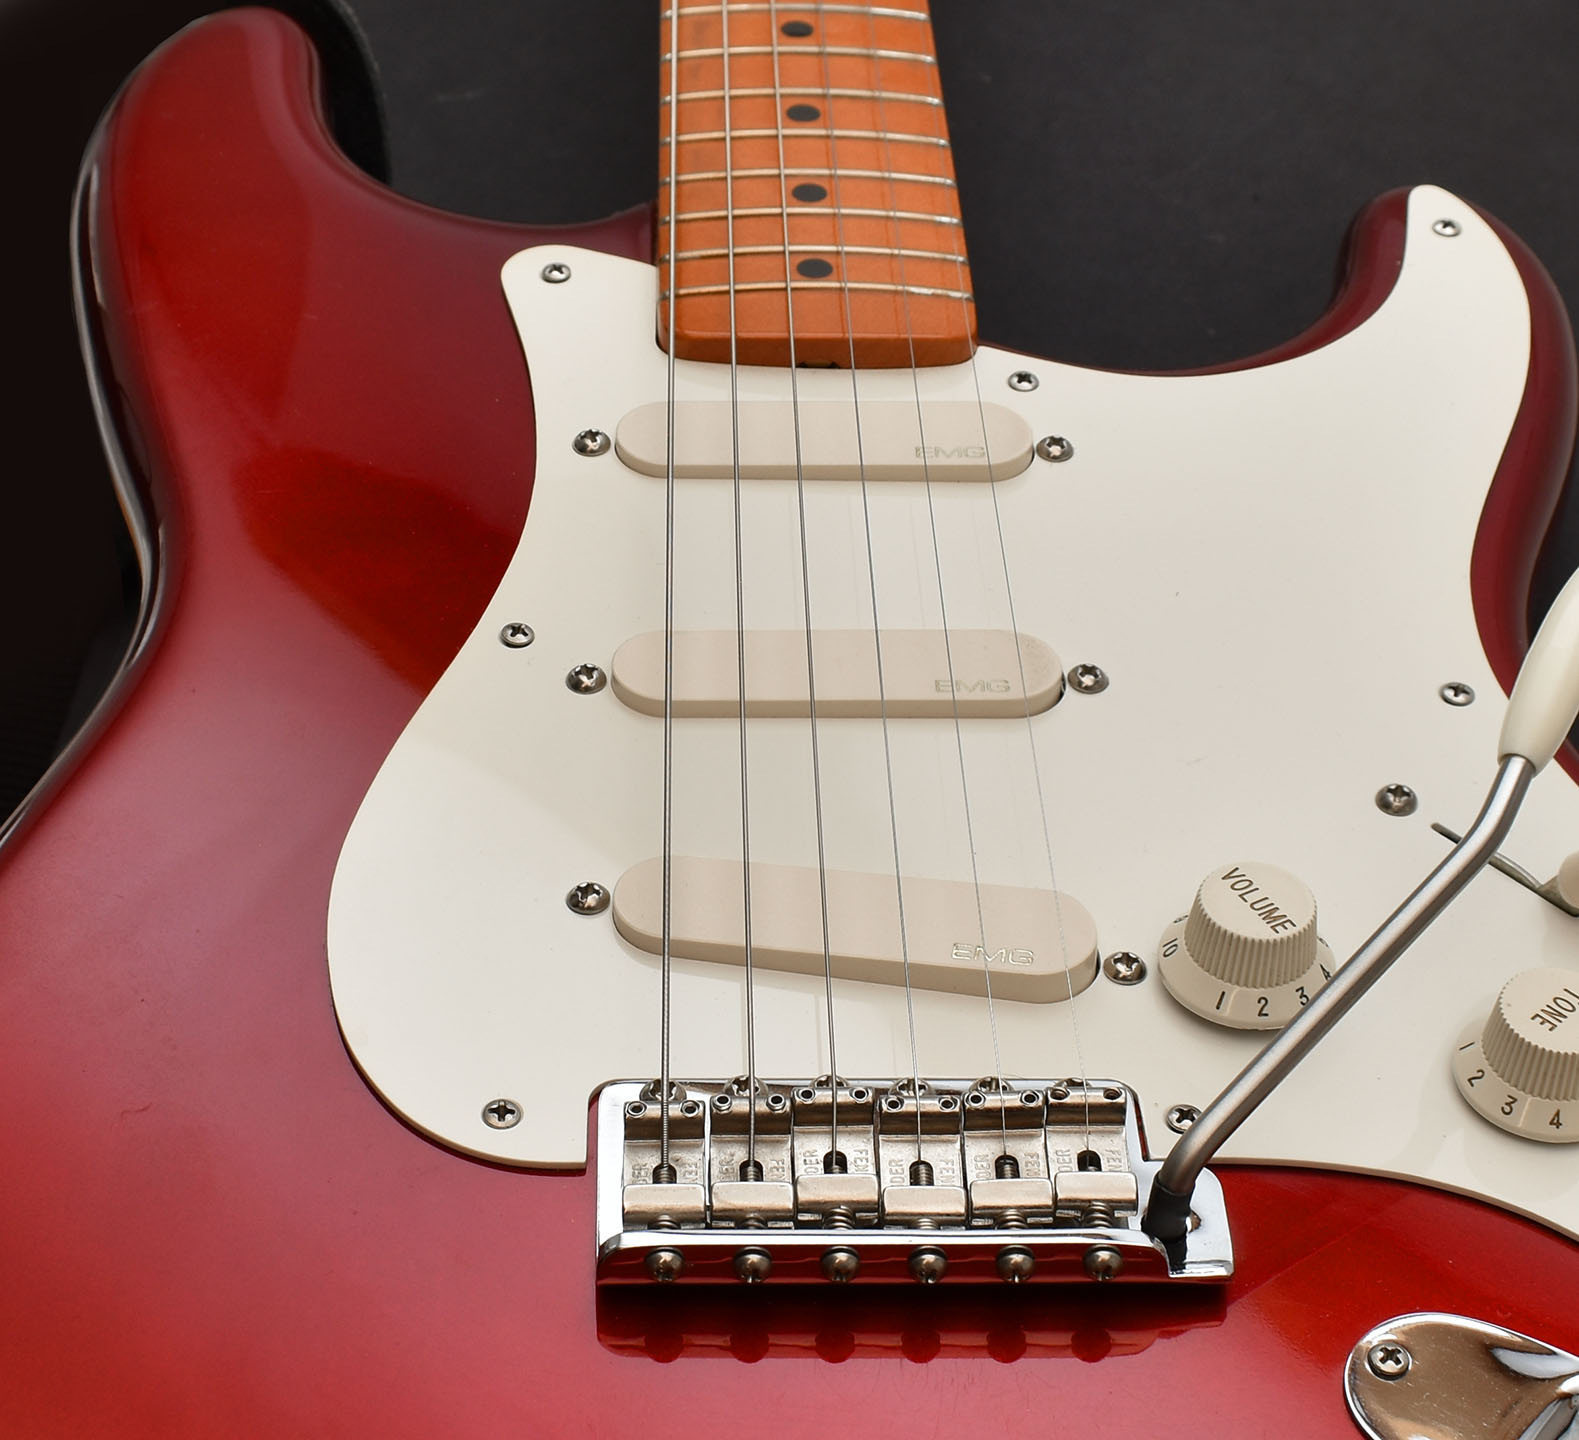
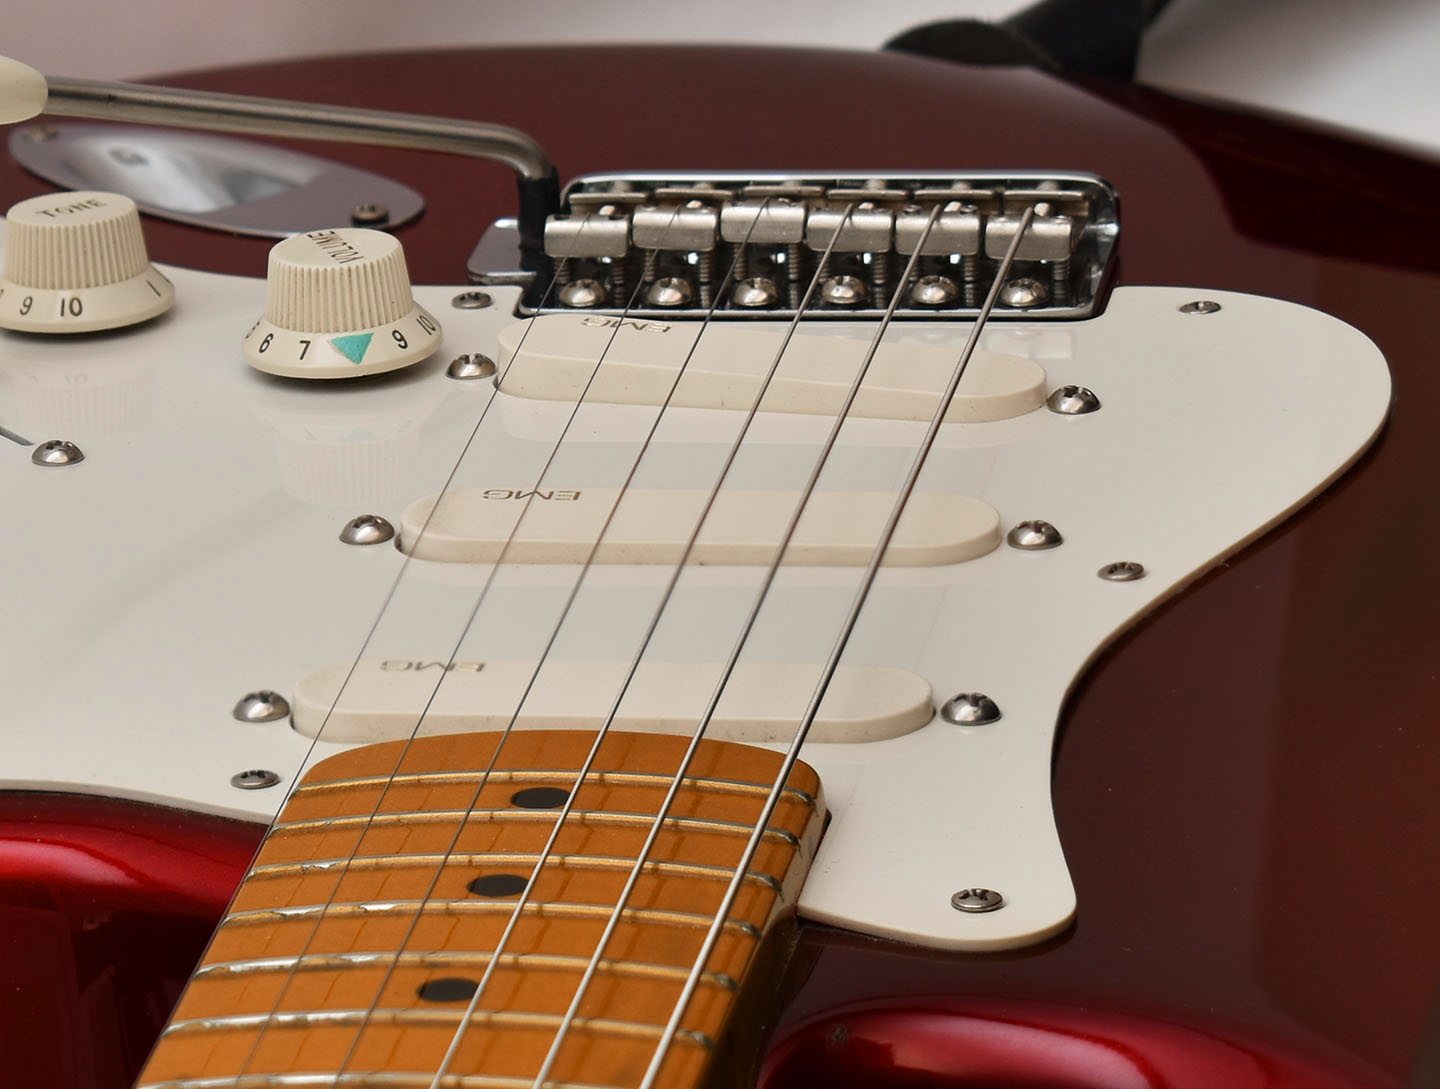
GILMOUR'S RED EMG STRAT PICKUP HEIGHTS - Gilmour seated his EMG pickups low in the pickup cavities of his V57 reissue Strat to make them sound more Strat-like. The high E string side of each pickup is slightly higher than the low E side. Keep in mind that this pick guard thickness is only 1-ply, which is approximately 1.4mm/.055" thick, so visually the pickups appear to be seated higher than they would appear on a thicker 2 or 3-ply pick guard. I do not have measurements for the EMG heights on the red Strat, but below are my EMG pickup heights, and photos showing Gilmour's pickups for reference.
Depress the strings at the last fret (highest fret next to the body) on the neck. Using a capo helps. Using a caliper or ruler, measure the distance from the bottom of the 1st and 6th strings (the treble and bass strings) to top of the pickup cover.
EMG Pickups________________________________Bass Side / Treble Side
Bridge:_____________________________________ 4.0mm /2.9mm
Middle:_____________________________________4.9mm / 4.5mm
Neck:______________________________________5.8mm / 4.3mm
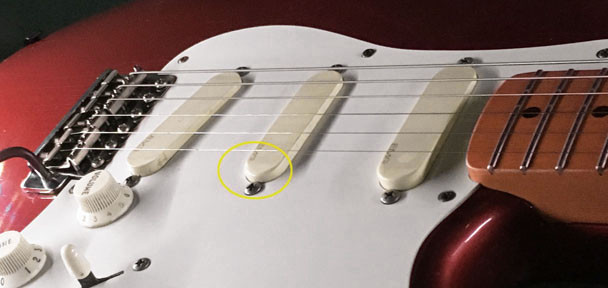
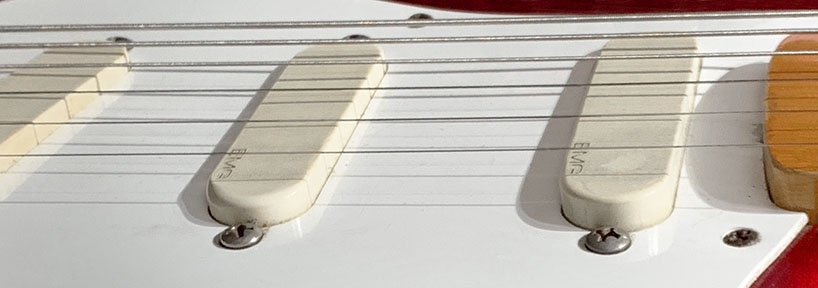
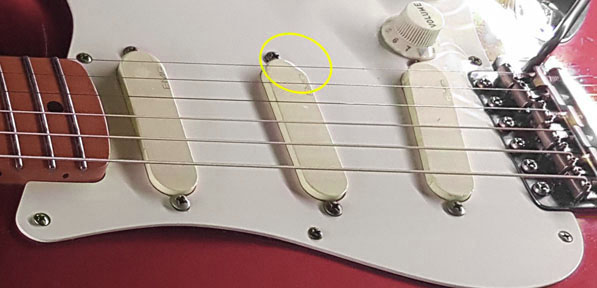
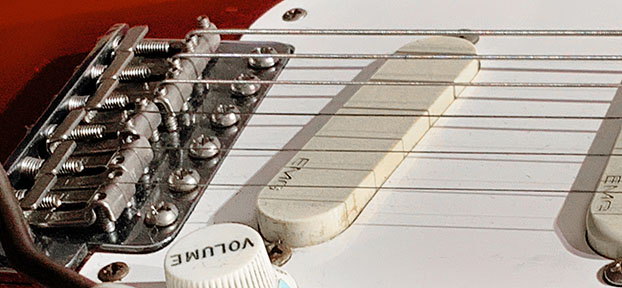
shown above - Gilmour's EMG-SA pickups in the V57 Red Stratocaster
my EMG-SA pickup heights
GILMOUR'S RED V57 REISSUE RED STRAT SETUP - In 1984 David went to the Fender warehouse and picked out several new Strats from their vintage reissue series (reportedly 5 or 6). All were later modified to have the tremolo arms shortened so David could hold them in his palm while playing, and EMG-SA noiseless pickups with SPC/EXG controls installed. One of those was a candy apple red (CAR) '57 reissue Strat. Its first major appearance being used on stage by Gilmour was the Live 8 benefit concert in 1985 with Bryan Ferry's band. The Red Strat would go on to become one of his favorite guitars to perform with live from 1986-1990, and his main guitar for the 1994 Pink Floyd world tour. In the studio he used it on Signs of Life and Learning to Fly from Pink Floyd's Momentary Lapse of Reason and The Division Bell album, and for his 2006 solo album On An Island. It was auctioned for charity in 2019.
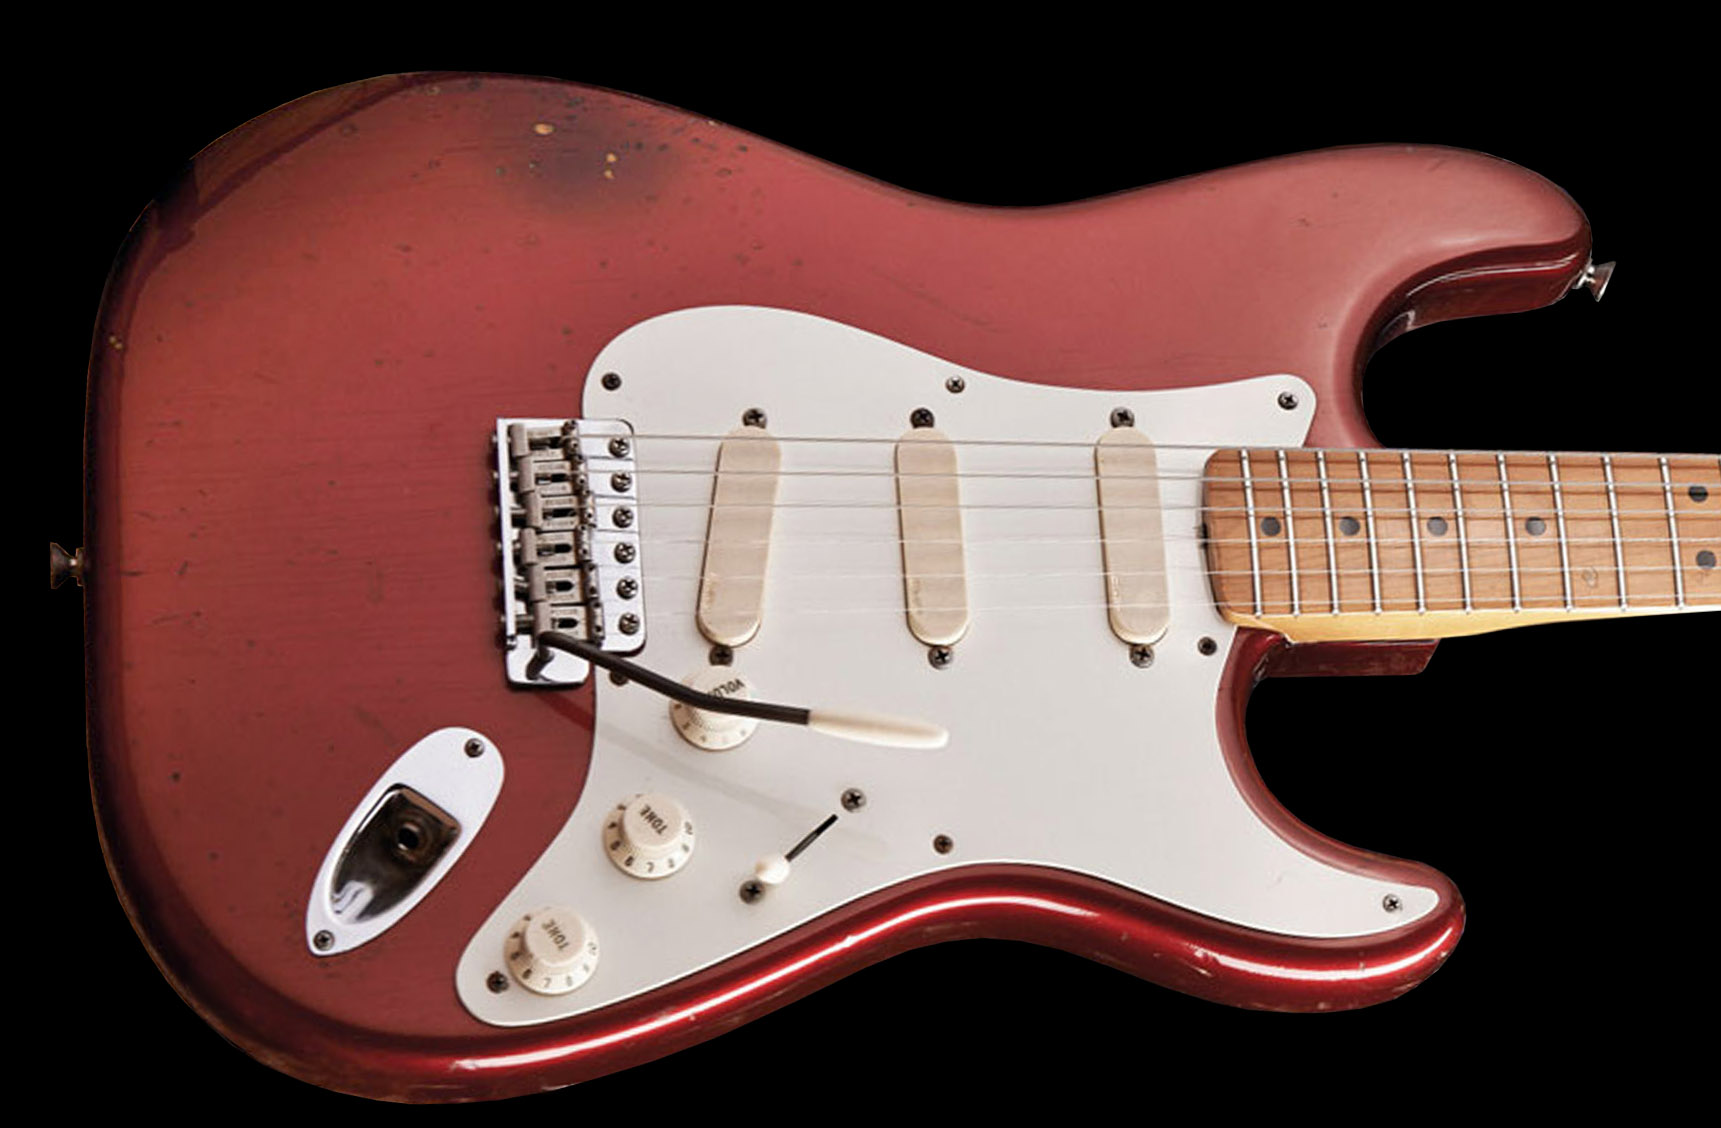
The Red Strat from 2016
As with the Black Strat, the red '57 reissue EMG Strat was set up with a floating bridge, 1.5mm off the body. David had this Strat modified to get it as close to the sound of his regular passive single coil Strats as possible. This primarily involved routing the pickup cavities deeper to allow the EMG pickup heights to be reduced farther into the pickup cavity, allowing the pickup height to be set lower than what was possible in the stock 57 reissue Fender body. Presumably his spare red EMG Strat was also given the same modification. Fryer Guitars did this and a few other mods to the Red Strat in early 1988 when Pink Floyd was on tour in Australia. The depth of the reissue cavities was 5/8", but David had them routed 3-4mm deeper. Each of David's pickups appears to be set less than 3mm (1/8") above the pickguard. Considering the vintage white pickguard on David's red Strat is only a 1-ply 0.055" thickness, they are set very low indeed. David's string gauge at this time was .010, .012, .016, .028, .038, .048.
Phil (Phil Taylor, David's gear tech) told me that David particularly liked to set the EMG pickups as low as possible in the pickguard which gave him a more Strat-like tone from the powerful output fatter sounding EMG pickups. In other words, setting them low ‘thinned up’ the EMG sound somewhat and gave more of an approximation to the original style Strat pickup sound that David favoured - Greg Freyer / Freyer Guitars
Note the thin 1-ply pick guard and how low Gilmour's EMG pickup are set. The pickup cavities were routed deeper so his EMG pickup heights could be set lower than what was possible in the stock 57 reissue Stratocaster.
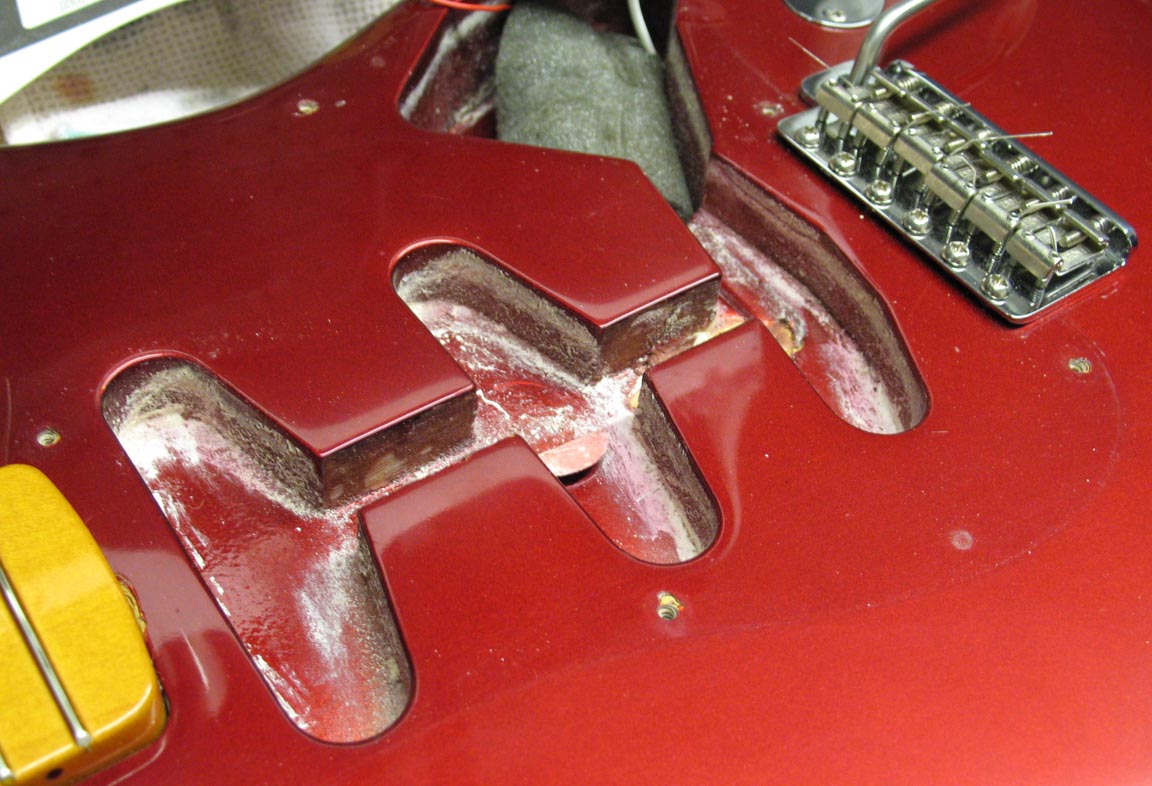
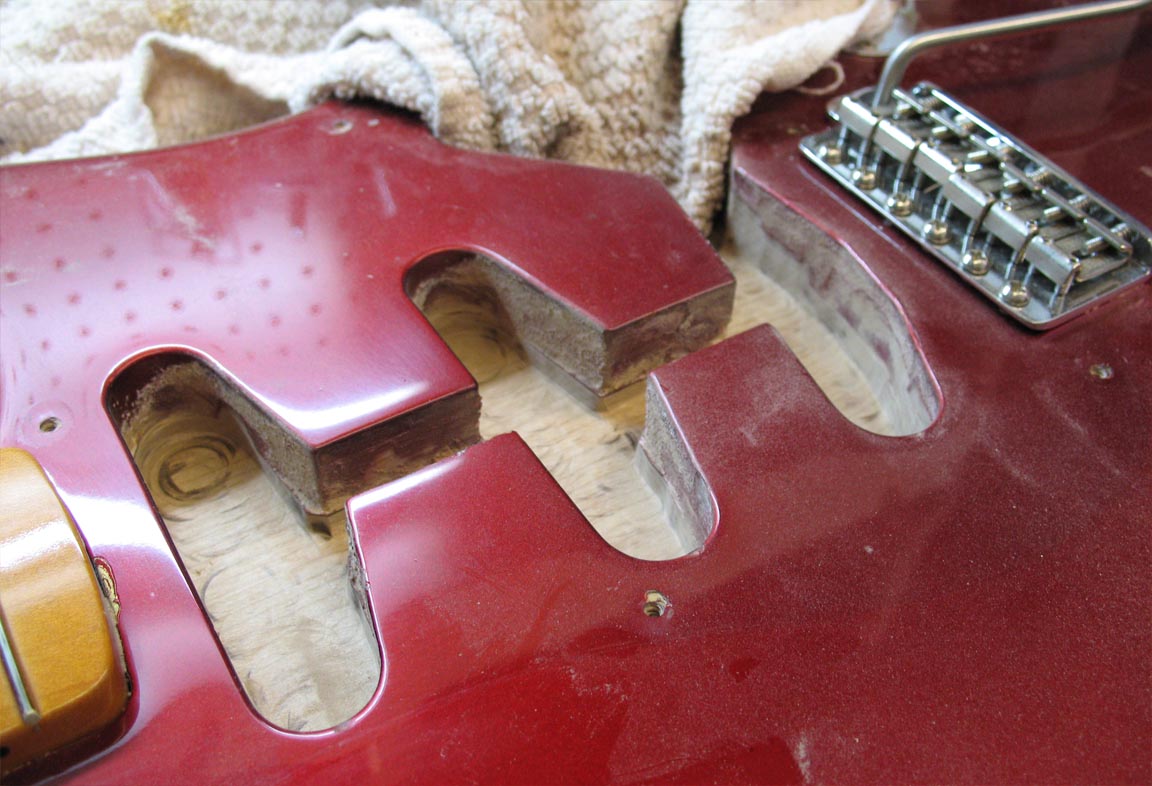
Shown above (L to R) - pickup cavities in a Fender Reissue 57 Strat before and after routing to allow the EMG pickup height to be set very low
NUT SLOTS - David uses bone nuts on his Strats. Here are David's specs for the Black Strat. Measured at the first fret beside the nut, the high E slot on the treble side is 0.25mm deep. The slots taper to 0.5mm on the low E on the bass side.
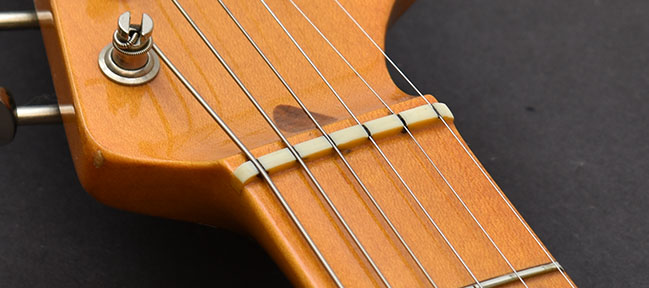
NUT LUBRICATION - One key to making a floating tremolo function correctly, and to keep the strings in tune, is to periodically lubricate the string slots in the nut. With tremolo use, the strings rub back and forth in the nut slots like a saw and over time some strings can bind in the slots. This can pull the strings out of tune and cause a popping sound that reverberates through the strings and claw springs. A simple solution, and something you should do periodically anyway, is to put a dab of lubricant under the strings in each of the string slots.
There are several wax and graphite powder lubricants made specifically for guitar nuts. Liquid graphite also works, but none of those seemed to last very long on my Strats. For many years I used a mix of vasoline and #2 pencil lead shavings (which is actually graphite) that worked very well. One day I tried some lithium grease that I had in my garage, and I have been using that ever since. It is the best lubricant I have found for guitar nuts. It works more smoothly and lasts longer than anything else I have tried.
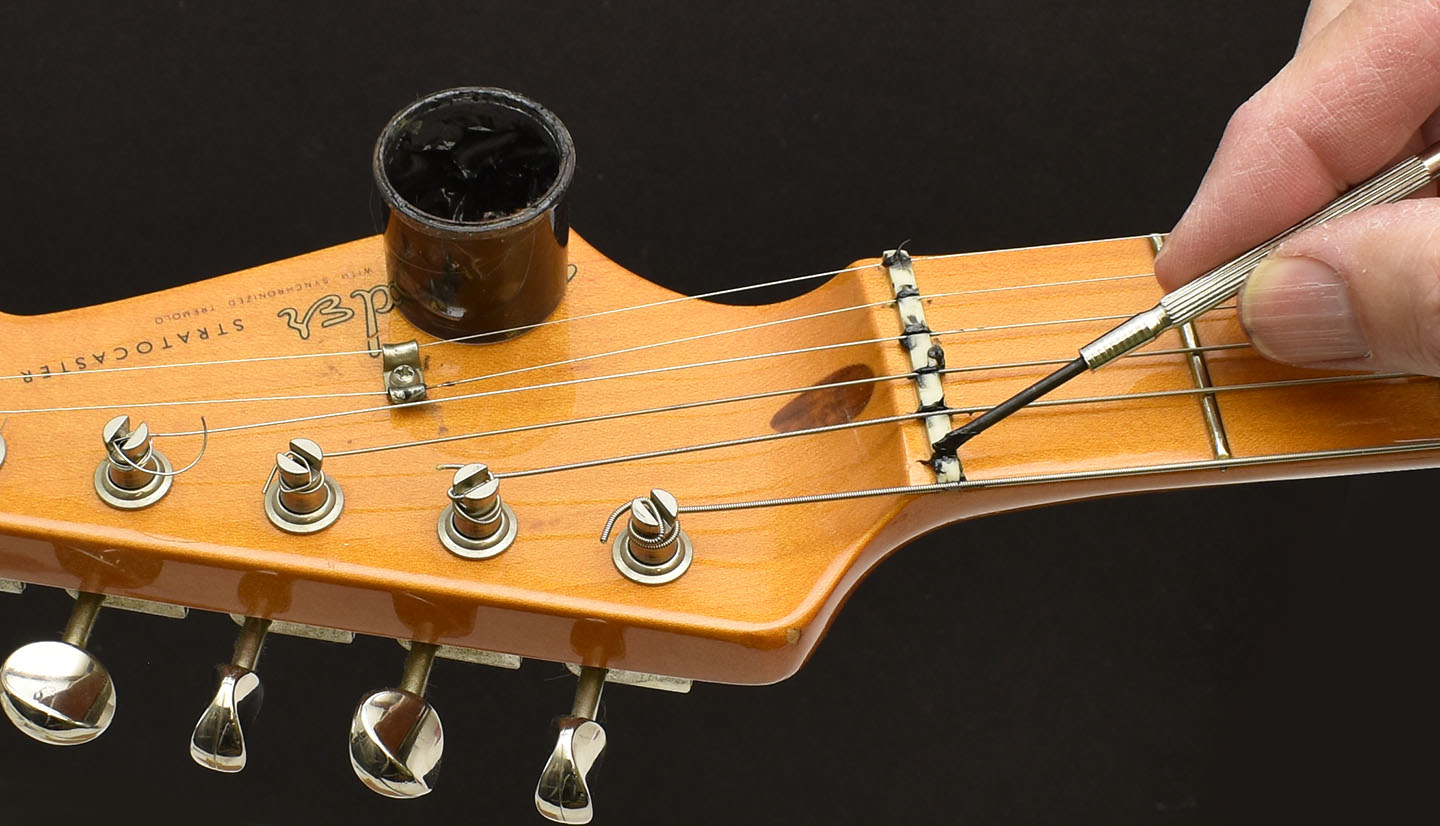
I use lithium grease in the strings slots of my Strat nuts to keep the action as smooth as possible with a floating tremolo
TIP - FIXING CREAKING/POPPING SPRING SOUNDS - Have you noticed the tremolo springs can become creaky and noisy, to such a degree that you can hear it through your amp? The creaking, poppy pings may sound like they are coming from the tremolo springs, but this is likely the strings sticking in the nut slots at the end of the neck. When the strings slide through the nut slot they can jam and stick over time as they move and cut deeper into the slot, creating a noise which vibrates all the way through the tremolo block and into the tremolo springs. First you should check that the nit slots are cut wide enough for the string gauge you are using, but the simple solution is to put a dab of lubricant under the strings in the string notches, as described above.
Even with lubrication, some springs can still make a creaking noise or have resonant sound. You can deaden that noise by inserting some fish tank air tube inside the spring coils. Another option is to shove a piece of packing foam rubber through the spring coils using a guitar string as a loop to pull it through. Either of those solutions dampens the resonant sound springs can produce, though some people actually prefer it and think it makes a Strat sound stratty.
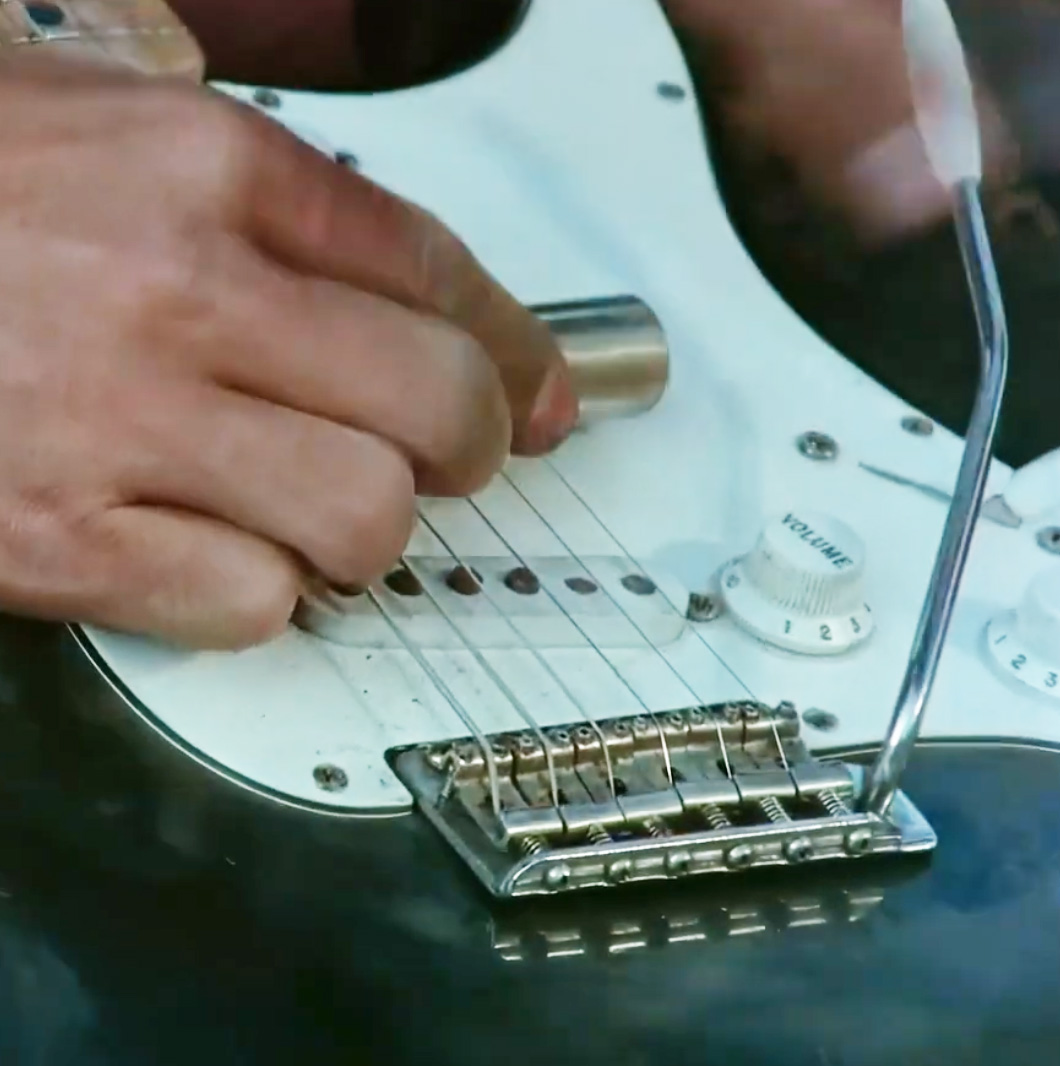
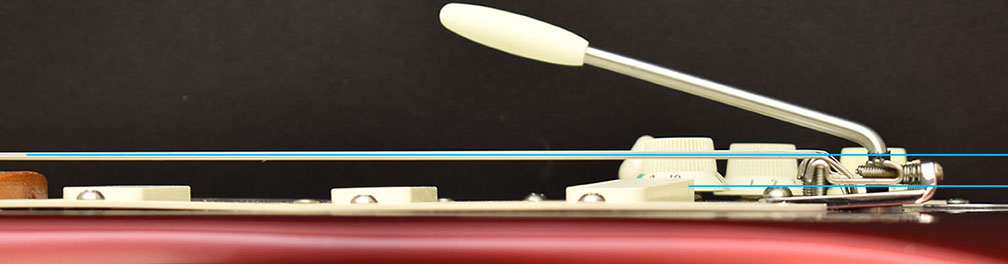
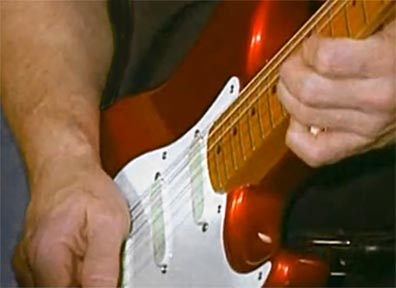
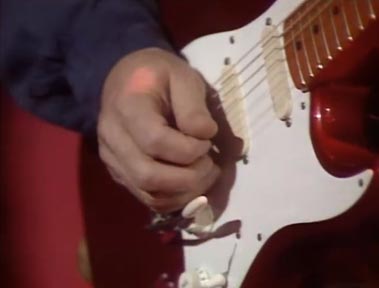
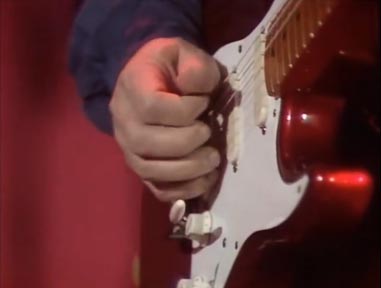
TREMOLO ARM SETUP - David keeps his tremolo (or whammy) arms fairly tight in the tremolo holes of his Strat bridges, not loose and swinging. Since 1984 he has used shortened tremolo arms in many of his Strats to allow him to hold the plastic tip in his palm and hold a pick and play at the same time. This is difficult to do with full length tremolo arms. Shortened arms are more comfortable to use and allow more control while playing. I tried this on my first Strat in the 1980s and never went back. I do it on all my Strats now.
A lot of guitar players have the arm going through their fingers, and when they want to wiggle it, they have to move their hand up three or four inches. At one point in my career I found that irritating, so I just cut one off with a hacksaw to see what would happen. It’s not like you need that extra length to get the proper amount of leverage if your tremolo system is set up correctly. Also, I like the tremolo arm to be stiff in its hole, so that when you let go, it doesn’t drop down and hang vertically. If I want to get rid of it, I can push it out of the way. - David Gilmour, Guitar Player interview January 2009
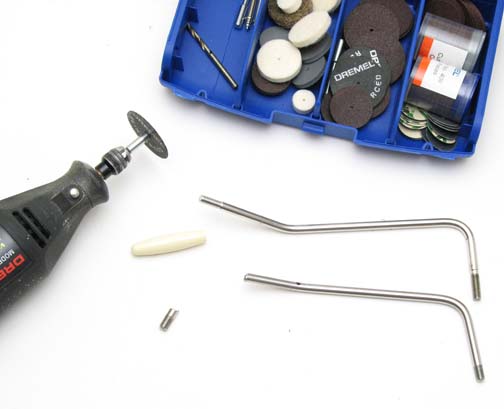
You can buy after-market tremolo arms that are already shortened, or do it yourself. I shorten my tremolo arms myself. I cut them short, about 133mm (5 1/4“), to fit in my palm when playing. David's are cut to 145mm and the tip is raised 45mm off the pick guard. Keep in mind the plastic tip will add some length after you re-attach it, so insert a piece of wire into the tip hole to determine how far the trem arm extends into it before you cut. Tips are usually 6mm (1/4”) longer than the trem arm.
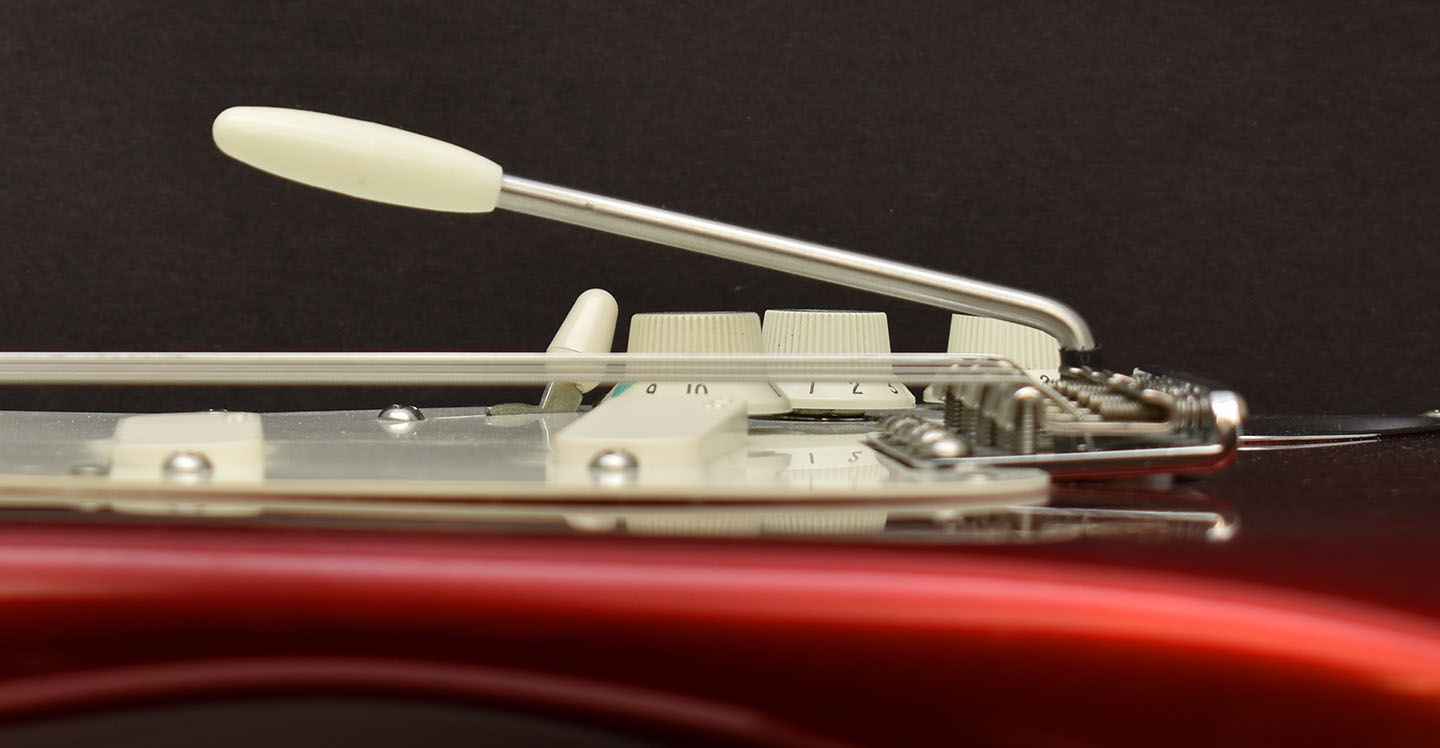
my shortened and re-bent tremolo arm
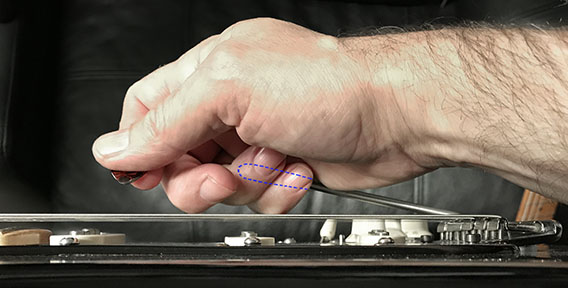
short tremolo arms allow you to more easily hold the arm and pick at the same time
Unscrew the plastic trem tip from the bar and mark your distance, adding to what you measured to compensate for the added plastic tip length. Lock the arm in a vice, but be sure to wrap the arm in a piece of leather, rubber, or cloth rag so the vice does not scratch it. You can cut it with a steel saw, or use a Dremel tool or similar hand held device (wear eye protection!) to cut it. I used a steel disk cutter with a Dremel tool. I also ground the sharp edges down after the cut with a sanding bit. You won't have any threads to screw the plastic tip back on after cutting it short, but you can glue it back on with a good two part epoxy, or heat the end of the trem arm with a flame for a minute, then push the tip back on tight.
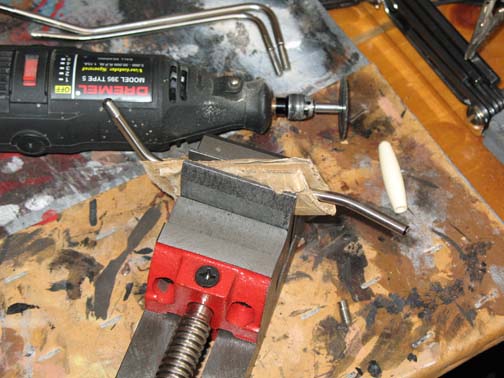
I bend my trem arm up slightly in a vice to keep it roughly parallel with the guitar body because my floating bridge is angled higher than David's, but most people will not need to do this with a slightly floating bridge. Be aware that most trem arms are hardened steel, so if you do re-bend, do it slowly or you may risk breaking the bar.
TIP- FIXING A LOOSE TREMOLO ARM - Strat tremolo arms are notorious for becoming loose and wobbly in the tremolo block. Some get so loose in the tremolo block hole that they produce an audible rattling sound from metal hitting metal when you rock it back and forth. Some arms are loose because the bridge plate holes and block holes never had very tight tolerances to begin with. On others, the threads simply wear out over time. This is not good for someone doing Gilmour style tremolo.
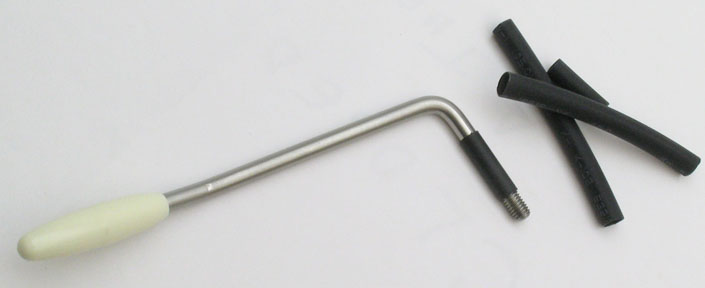
Most people simply wrap the threaded area of the arm in plumbers tape, but that quickly wears out and needs frequent replacing if you are a heavy tremolo arm user. A more longer lasting solution is to use heat shrink tubing, the type used to cover and protect wire solder joints, like you see inside some hand made and production guitar pedals. It is easily available online or anywhere that sells electronics or soldering supplies. You simply heat it and it shrinks around the steel bar.
You want a shrink tube diameter slightly larger than the diameter of the tremolo arm. Most American Strat arms are around .188" (4.78mm) thick, so use 3/16" or 5.0 to 6mm heat shrink tube. Mexican and Japanese Strats arms are usually 5mm, so use 1/4" or 6.0 to 6.5mm heat shrink tube. Cut the length long enough so it extends from the top of the threads to just outside the bridge plate hole, as shown above. Heat the tube with a heat gun or hair dryer until it shrinks, then re-install into the bridge. The arm will fit tight, so you may have to press hard when first threading it into the hole. Cut off any excess tubing that extends above the bridge plate, if desired.
Kit’s Secret Guitar, Gear, and Music Page
Guitar stuff, gear stuff, soundclips, videos, Gilmour/Pink Floyd stuff, photos and other goodies.
Copyright Kit Rae.
VISIT MY SWORDS, KNIVES and FANTASY ART WEBSITE www.kitrae.net